This course provides in depth demonstrations of how to work with candidates within Voyager Infinity.

Adding a New CV

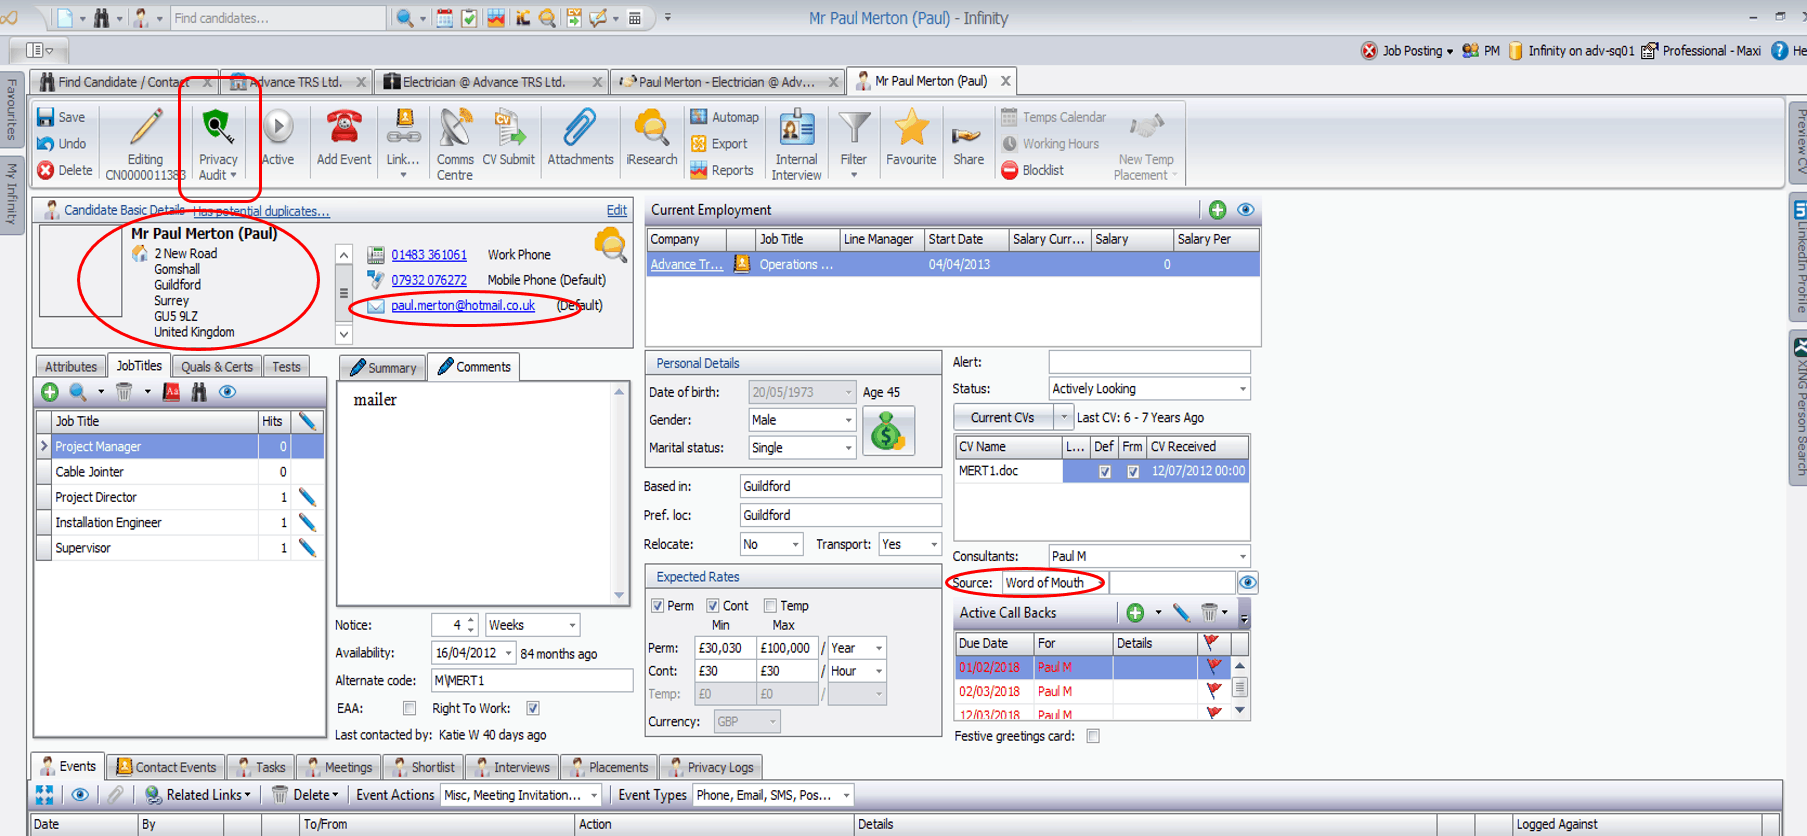
The CV’s for the candidates are stored with the Current CV’s area.

The candidate can have multiple CV’s against their record.

CV’s can be added to Infinity manually, iCapture or by dragging and dropping the CV into the CV’s area.

  • New CV – This enables you to create a CV on behalf of the candidate, format a CV document that a candidate has sent you or save the CV as the candidate had sent it for formatting later.
  • Open CV – Highlight the CV in the main CV area and click open CV. This will open the CV in word.
  • Copy CV – Allows you to copy the CV so that you are able to make a change to have multiple copies of the same CV
  • Delete CV – Delete a CV document from here
  • All CV’s – View all the CV’s. This shows you all the CV documents

When you add a CV into the CV area you will have a choice of the type of formatting you’d like to apply to this CV.

If you don’t want to apply a builder, click Skip. To see what the document will look like, click Preview.

Click CV Options to see more option with how the CV builder behaves. You will only need to go here if you want to make a change. The builders will have had the options chosen for you.

Once you have chosen your format and clicked OK you are able to rename the document by over-typing Name: the Online Reference is if the CV is stored online or you would like to be able to submit a website (e.g. LinkedIn, innovate CV) to a contact rather than a full CV. Choose whether the CV stored is the Current CV, Default CV or whether it is Formatted. Put ticks in the relevant boxes to identify your choices.

Click Save or Cancel

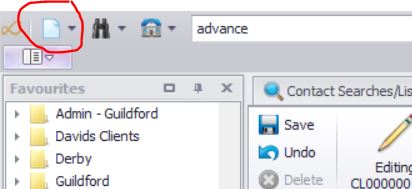
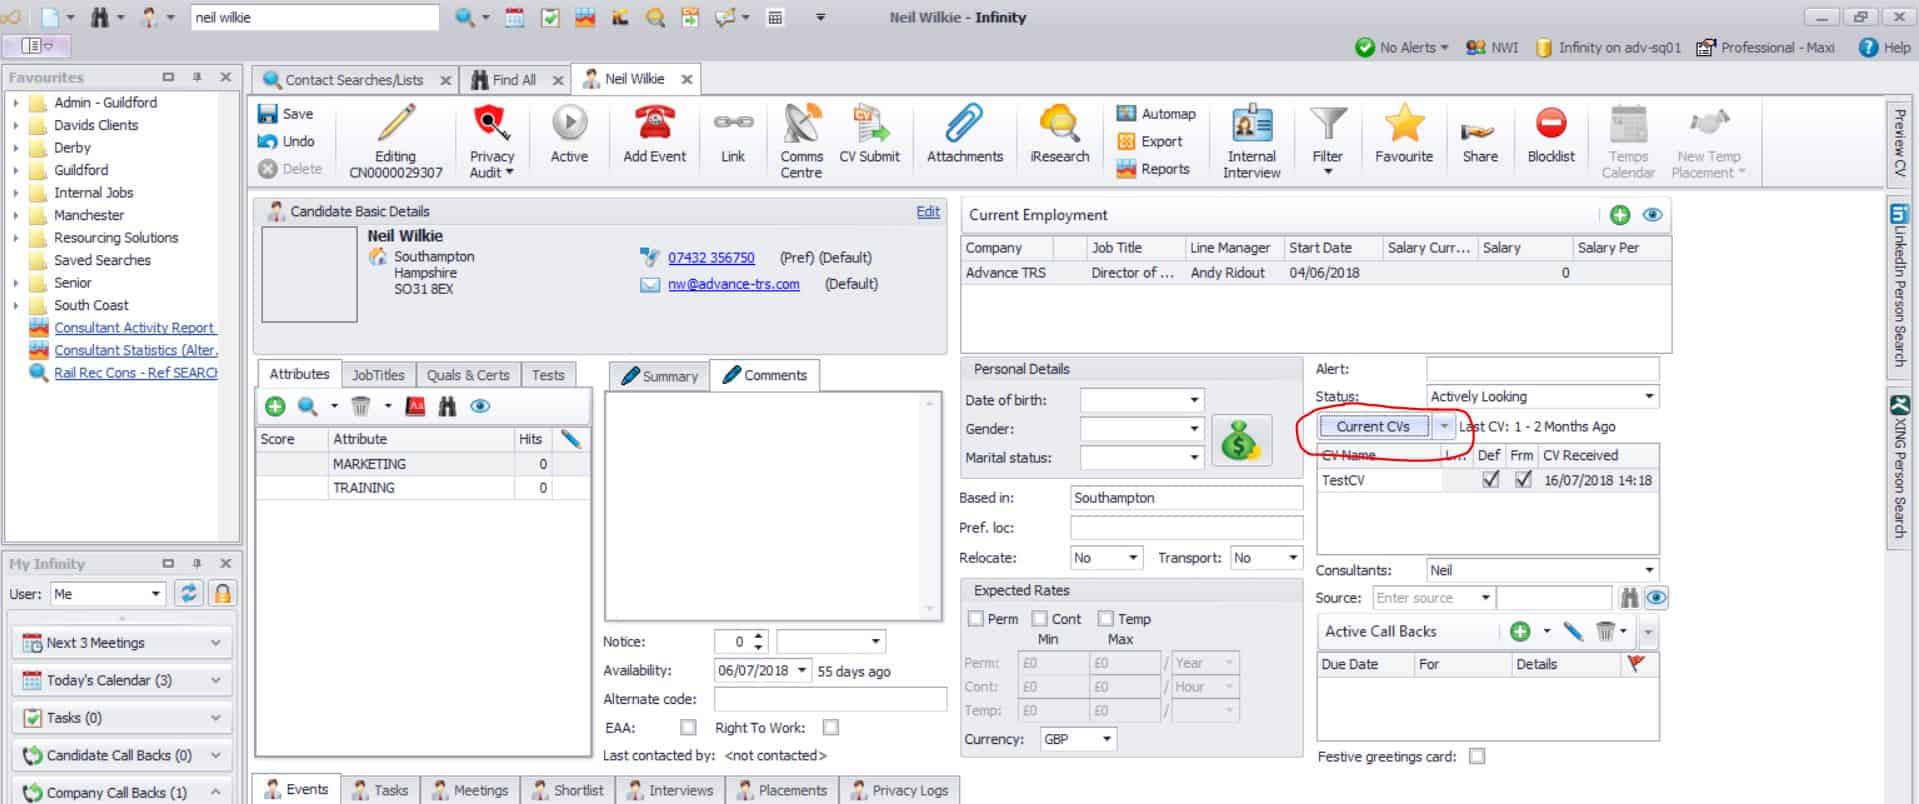
To manually add a CV to a candidate, click the arrow to the right of the current CV’s button.

  • New CV – This enables you to create a CV on behalf of the candidate, format a CV document that a candidate has sent you or save the CV as the candidate had sent it for formatting later.
  • Open CV – Highlight the CV in the main CV area and click open CV. This will open the CV in word.
  • Copy CV – Allows you to copy the CV so that you are able to make a change to have multiple copies of the same CV
  • Delete CV – Delete a CV document from here
  • All CV’s – View all the CV’s. This shows you all the CV documents that are available for this candidate. You are able to have the same options as the main screen
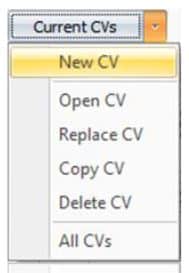
Open a CV

You can open, copy or delete a CV that is stored against a candidate

Start by finding the correct candidate record. Highlight the CV that you would like to view and Right hand mouse click, choose open CV.

The CV will open into Microsoft Word.

  • If you don’t want to make changes to the CV, use the Cancel option.
  • If you have made changes use the Save Options option on the toolbar.
  • You can change the name of the file here (this will rename the document), or change the file extension so that you can save it as a different type of document. I.e. PDF.
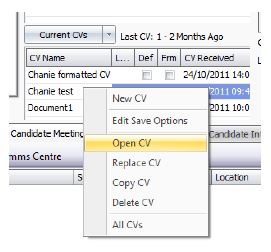
Copy a CV

Sometimes you may want to create an alternative version of the CV. Again, find the correct candidate record. Highlight the CV that you would like to view and Right hand mouse click, choose copy CV.

  • This will immediately create a copy of the CV and name the new CV
  • It is likely that to see the CV that you have created you will need to view all CV’s.
  • Click on Current CV’s and choose all CV’s

Taking your candidate through offer to placement.

Candidate Record Checks

Running an offer is a simple process, however, it can quickly get complicated if you progress to the next stage without checking the information already entered.

Remember. Once the placement is run, a lot of the important information gets ‘greyed out’ and is only editable by the finance team through Mid Office.

Step 1: Check the candidate information is correct before proceeding to the offer stage. 

Key information required to ensure offer & placement run correctly:

All this information can be added by clicking ‘edit’ in the right hand corner of the Candidate Basic Details box.

Essential InformationNotes
NameSpelt correctly, with Capital letters fo the First and Last name
AddressAddress must be correct with capital letters where appropriate
PostcodeMust be correct
Email AddressMust be correct
Source CodeMust be correct – where did you find the candidate?
Privacy Audit for GDPRThis must be green, if it isn’t speak to the Admin team

Congratulations on completing this course. Please make sure you may print your certificate and forward to Becky in HR.

Sending Emails

Step 1 – You can access the Comms Centre in almost any kind of record

Step 1 (cont.) – You can also access the Comms Centre in results

Step 1 (cont.) – Accessing the Comms Centre in Shortlist

Step 2 – Template Options

Step 3 – Editing Templates (Word)

Step 4 – Sending Email(s)

This course provides in depth demonstrations of how to add and manage jobs, advertisements, CV submittals and interviews within Voyager Infinity.

Adding a job

You can add a job either from:

  • Company/location/contact record via the Add New Job button (to add against a contact you must click on the contact’s name first)
  • The new icon on the quick access toolbar
  • The application menu – New – Job

Basic Job Details

The basic job details are the company, contact etc. related to the job. Voyager will show you a list of similar roles to prevent duplication. If you create the job directly from the contact at the correct location and the correct company you will not need to fill this information in. If you have created the job independently, you will need to complete this information. Once you are happy with the information, click Create New.

Once you have clicked the Create New button you will need to flesh out the job details.

Job Type – specify here the type of job. Permanent/contract/fixed term/contract to perm. This is a drop down list.

Job Status – the current job status, open, ongoing, on hold, Partially filled, Filled all Places, Closed all Places

Source – where the vacancy came from i.e referral, existing client, sales lead.

Alert – type anything here that you would like as an alert on the job page.

Last Contacted By – this is a system generate field by Infinity that specifies the last time there was any contact made in relation to this job, and by whom

Job Title – this is the job title for the role. This is a drop down list, not a free format area. The Job title list is controlled by your system administrator. Job titles are treated in a similar way to an attribute. It is assumed that a candidate will need to hold this job title to match in searches for this job.

Job Location – if you have created this job from a company record it is likely that this will be populated for you. If you need to change the location however, click on the binoculars and choose the correct location.

Reports To – you are able to either type directly into here, or choose from the binoculars the correct person that the job reports to. This is different from the contact that owns the job at the company. This is likely to be the line manager for the candidate.

Review Date – the review date will default to a month. Change this here if necessary. When the job reaches it review date Infinity will remind you in your My Infinity (Review list)

PO Number – allocate the correct PO number to the job here. To add a PO select the green plus and then you can either select from an existing purchase order or create a new one.

Client Ref – enter a manual reference here if the company has asked you to reference a particular job number.

Project Code – enter a relevant project code here if necessary.

Start Dates/ASAP – enter the start date for the job (if there is one) or tick the box for ASAP

Salary – enter the minimum and maximum salary and package values. Enter the % fee value; Infinity will work out the expected fee.

Consultant – this is the owing consultant for the job. Change it here if necessary. You are able to multiple owners by clicking on all the names that apply.

Description – this is the description of the role. It is likely to be a job advert, or a job description. This fields can be a merge and can be formatted and spell checked.

This course provides in-depth demonstrations of how to work with clients and contacts within Voyager Infinity.

Adding New Companies

Adding Location Details

Adding the Contact

This course provides in-depth demonstrations of how to add and search for candidates within Voyager Infinity.

Every candidate added requires:

  • 3-5 attributes
  • Correct address information (post code)
  • Source (where did you find this candidate?)

  • Plus correct contact details and preferably a CV

Adding a Candidate Manually

To add a candidate manually, go to the top of the Infinity screen, click on the page icon and then select Candidate from the list.

Before creating the new record, Infinity will prompt you to enter some details to see if the record already exists. The best method is to enter the Surname and Forename (as below). Any records that match this criteria (both candidates and client contacts) will be displayed below.  If the record already exists you can simply double click into it and update.

If your record doesn’t already exist, click on the Create candidate button.

The system will now create the candidate record for you. But at this point it is entirely blank. We will need to update it with information to ensure it is a worthwhile record.

Step 1 is to add details about where the contact lives and some contact details. Click on the Edit button (circled below). You should aim to fill out a phone numberemail addressTown and Post Code as a minimum. If you don’t know the post code, select a post code for the place that they live (you can Google this). Records without postcodes will be very difficult to find to have little value. You should aim to fill in as many fields as possible.

Step 2 is to update the current employment status. Click on green plus icon in the Current Employment section and then enter the details. You should aim to add a minimum of the Company and Job Title.

Step 3 is to add some attributes so you can search for the record at a later date. Click on the plus icon in the Attributes section, type in your attribute and then click Add to confirm it against the record. You should aim to add several attributes relevant to the candidate covering their experience and projects.

Step 4 is to add all the job titles relevant to the candidate, again to enable us to search for them in the future.

Once you have added any other pertinent data, the final step is to click on the Save button to commit your changes to the database. You can now go on to add notes, add as a favourite and add other events to the record.

This course provides in depth demonstrations of how you use each of the core dashboard and homepage within Voyager Infinity.

Dashboard

The Voyager Infinity dashboard offers important insight into everyday activities allowing you to easily track pipeline and performance on one simple, zero maintenance screen.

Estimated Revenues
Permanent Actual – A placement has been made and the candidate has been started.

Permanent Forecast – A placement has been made, offer accepted and Confirmed.

Permanent Pipeline – The total of all vacancies currently on the database without any confirmed offers (excluding any ticked as spec job)

Contract Actual – An estimate of the total value of a started contractor (based on placement input i.e. pay & charge, hours and end date).

Contract Forecast – A placement has been made, offer accepted and Confirmed but the contractor has not yet started.

Contract Pipeline – The total of all contract vacancies currently on the database without any confirmed offers (excluding any ticked as spec job)

Estimated Permanent Revenues
Chart of permanent placements which have started

Estimated Contract Revenues
Chart of contract placements which have started

Candidate Activity
New Candidates – Number of candidates added through iCapture and manually created to the system between the date range

Internal Interviews – Number of internal interviews logged between the date range with any method

Calls – Number of candidate calls logged on the system between the date range

Emails – Number of emails sent from Infinity to candidates between the date range

Spec Activity
Spec CVs – Number of speculative CV’s submitted by the consultant between the date range

Spec Sum CVs – Number of Candidate summaries submitted speculatively by the consultant between the date range

Target Ratio’s
New Candidates:Interviews – Percentage of New Candidates added to Interviews logged

CVs:Interviews – Percentage of CV’s submitted to Interviews logged

Interviews:Placements – Percentage of Interviews logged to Placements made

Calls:Meetings – Percentage of calls made to contacts to meeting arranged

Company Activity
Cold Calls – Total number of Company/Location/Contact calls made with the event of Cold Call between the date range

Meetings – Number of meetings arranged with Company/Location/Contact

Company\Contact Calls – Total number of calls logged to Company/Location/Contacts between the date range

Company\Contact Emails – Total number of emails sent from Infinity to Company/Location/Contacts between the date range

Job Ratio’s
Jobs to Cv’s – The number of Cv’s submitted against jobs created during the same period

Jobs to Interviews – The number of interviews arranged against jobs created during the same period

Jobs to Offers – The number of offers made against jobs created in the same period

Jobs to Placements – The number of placements created against jobs added during the same period.

Average time between adding a job
And first CV Submitted – The amount of days it took before a Cv was submitted for a new job added

And first confirmed Interview – The amount of days it took before the first interview was logged as confirmed by candidate and client against a new job

And first offer – The amount of days it took before the first offer was made against a new job

And first confirmed placement – The amount of days it took before the first placement was confirmed against a new job added.

Job Activity
New Jobs – New Jobs added by the consultant between the date range

Summaries Submitted – Number of Candidate summaries submitted within a Job by the consultant between the date range

CVs Submitted- Number of CV’s submitted within a Job by the consultant between the date range

First/Tel Interviews – All 1st Interviews (Face to Face/Telephone) logged between the date range

Other Interviews – All other interviews logged between the date range

Offers – Total number of offers made to candidates between the date range

Offers Accepted – Total number of offers accepted between the date range

Placements Made – Placed – Total number of candidates placed between the date range

Average Permanent Fee
An average of all the fees for placements that have been made and the candidate has been started.

Average Hourly profit
An estimate of the total value of started contractors (based on placement input i.e. pay & charge, hours and end date and whether the contractor placed is PAYE or self employed.